VASSAL TUTORIALS - Map Making, page 3
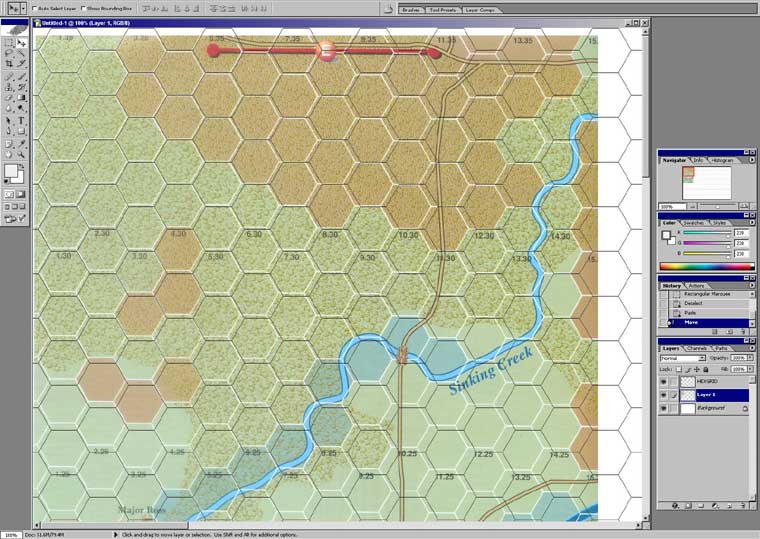
Now, we can apply each scan to our canvas that has the hexgrid on it. Make sure that each scan goes to it's own layer, and that each of those layers are below the hexgrid:

Our scan map not be resized exactly as it should be, but it should be close.
Make sure that you place the scan where it should go on the hexgrid. Start with one of the corners obviously (top left is my choice). Now, the trick is align this scan to your hexgrid as closely as possible. You more than likely wont get it to match exactly, but that's ok.
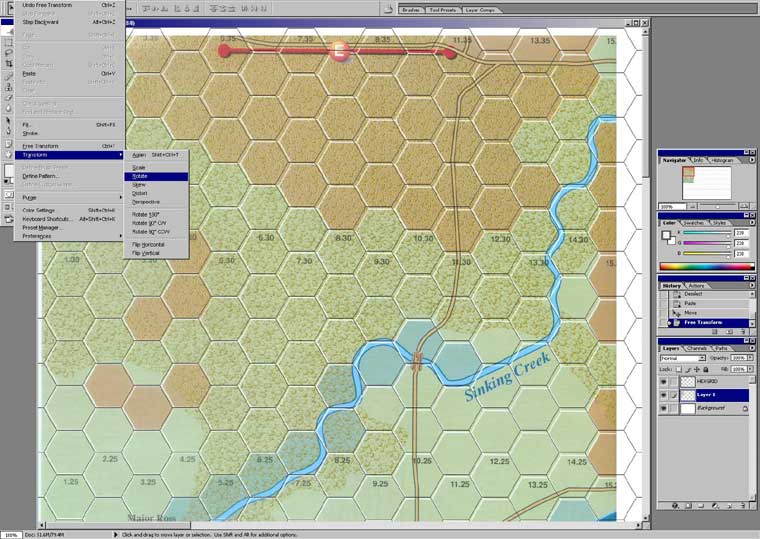
The first step is to adjust the width/height of the scan (scale) using EDIT > TRANSFORM > SCALE. Stretch to the right, and pull the scan down until you're close in alignment with the hexgrid. Make sure that you're on the proper layer of course - we don't want to touch the hexgrid at any time - just the scans. Sometimes you get lucky and just a little scaling willl get a good alignment. Usually though, your scan needs some rotatation. This is choice #2 for making the alignment; EDIT > TRANSFORM > ROTATE:

Perhaps just a little rotating and then a couple of final 'scaling' tweaks and you have the first sheet aligned. As a last resort, you can choose to EDIT > TRANSFORM > DISTORT to pull at the corners. I try to avoid this unless my scan is just that far off as it, well, distorts the scan. Once aligned, you'll know it:

Now, we just add the rest of the scans - simple eh? Ok, it's some work, but believe me, you'll love how easy it is to then to apply the final version of your map to the VASSAL editor with the hexgrid nicely (and perfectly) aligned.
The next chapter will cover PAINTING YOUR MAP. I hate using scans - wrinkles and folds and tears and smudges all wind up on your final product. Instead, I use the scans as my template and I then completely repaint the entire map!
<more later>